Traditional methods to Beat the Heat
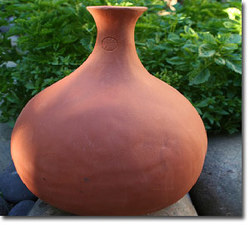
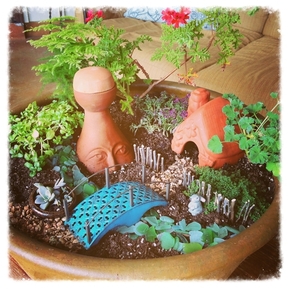 Ollas are traditionally made as a bulbous bottle-shaped form with a narrow neck that is capped by a plug or lid to prevent critters and debris from getting inside the pot. There is no set rule on an olla's shape, however, and you can get creative with your design! The size of the olla will depend on many factors: available space, type of soil, sun exposure, number of plants, etc. Your ollas can be as functional or sculptural as you want. Check out this clever face design (left) from Dripping Springs Ollas! They are very easy to install (just dig a hole!). The best time to put them in is when you are first planting a bed, however if you are very careful, it is possible to introduce an olla to an established garden. These simple pots can be made by anyone, and can be very helpful for any gardener! Let's make an olla!Start by choosing an appropriate clay body to make the pot. We recommend using Cinco Rojo, Armadillo's mid-fire red stoneware clay that is very porous when fired to cone 04. You may also use other clay bodies such as stonewares, as long as you only fire them to cone 04. Though traditional ollas are made from terracotta clay, our Longhorn Red loses most of its porosity at cone 04, so we recommend the Cinco Rojo for best results.
Time to make your olla! Important attributes to include in your design: - A good-sized well (the belly of the vessel) to hold water. The larger the well, the less frequently you have to fill it! - A narrow neck. This minimizes the surface footprint of the olla, leaving more room for plants. Just make sure you can still easily fill it up! - A lid. The style of lid makes little difference, so long as it fits well. If you cannot make a lid, or if the lid you made doesn't work out, you can always use a rubber plug, snug-fitting rock, or other means to seal off the mouth of the jar. Let dry and fire to cone 04. Glazing Traditional ollas are left unglazed, but contemporary makers have found that by glazing just the neck, mouth, and lid, you can significantly reduce the water lost to aspiration/evaporation through these exposed, above-ground sections. The well of the pot that remains beneath the soil must be left unglazed (inside and out!) to allow the water to pass through the pot into the soil. Apply a low-fire glaze and fire to cone 06, install in your garden, and fill with water. Now you can sit back and enjoy your summer, with less watering and happier plants! Note: Make sure to check the water level of your olla daily for the first few weeks, until you get a feel for how frequently you need to fill it! Show us your handmade ollas and share tips for other gardening potters on ourFacebook page!
6 Comments
|