|
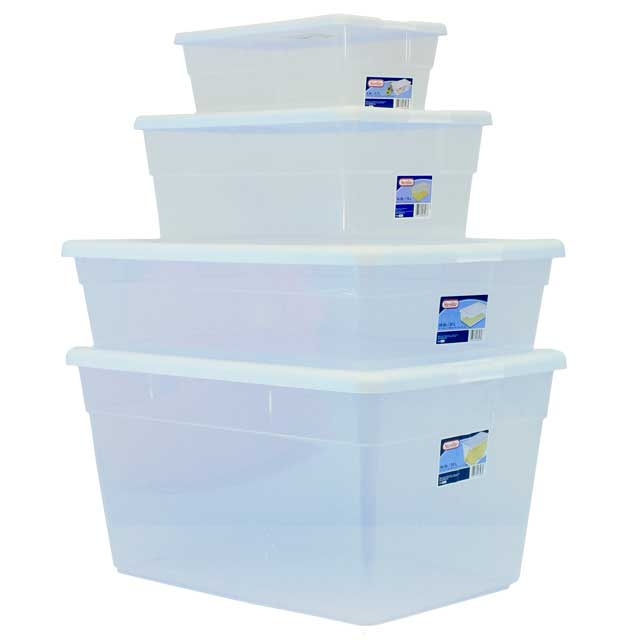
Why and How to Make Your Own Making pots takes time. Decorating them takes even more in some cases. One thing that is always at the forefront of a potter's mind is the moisture state of the piece. If it's too dry, the carving tool will leave ragged edges. If it's too wet, the clay will stick to the tool and smear. Timing that handle attachment or that mishima scraping is a major part of our art that takes practice and patience to perfect. Let's face it, though: we all have busy lives, and sometimes, time constraints don't allow us to wait for just the right moment. Luckily, there is an easy solution that makes a great addition to your studio: a damp box. A damp box is a humid container in which to store in-progress claywork. You are creating a makeshift version of this every time you put a plastic bag over an incomplete piece. The advantange of a damp box is that you can do this without the hassle of the plastic bag, or the potential surface marring it can cause. Now, you could pay hundreds (or even thousands) of dollars for a fancy damp cabinet from a manufacturer, but I'm a broke twenty-something who pinches every penny until they beg for mercy. Why pay all that money for something you can achieve with $20 and 30 minutes of your time?
Once you have chosen your box, you will need some plaster. I prefer a medium-density plaster such as Puritan Pottery plaster or #1 Casting plaster (both are available at Armadillo Clay). You will want to weigh out about 10 lbs of plaster for a 30-40 gallon box. Smaller boxes will use less plaster. Assuming you are using one of the two plaster choices I recommended, you will need about 6 1/2 pints of water to make up that 10 lbs of dry plaster. In a clean bucket, measure out your water, then add in the dry plaster and mix for about 5 minutes. Make sure to wear a respirator! Once your plaster is well-mixed, carefully pour it into your box until you have about an inch depth of plaster in the bottom. Too much, and the box will be very heavy. Too little, and your plaster layer will be prone to breaking when you move the box around. Let the plaster set overnight, lid off.
Your damp box is ready to use! Make sure to leave the lid off when it is not in use, to avoid mold growth. If you do get some mold growing, you can spray the plaster slab with a bit of well-diluted bleach. To recharge your damp box, just pour some fresh water onto the plaster slab. I prefer to have a layer between the plaster and my pots, so I cut some old Orton Cone box liners to make a soft sponge layer on top of the plaster. Once you have a damp box, you'll wonder why you didn't make one years ago!
8 Comments
|