ARMADILLO CLAY AND SUPPLIES
  • HOME
  • Clay
    • Low-Fire (04-06)
    • Mid-Fire (5-6)
    • High-Fire (9-12)
    • Non-Fired Clay
    • Casting Slip
  • Glazes
    • Underglazes
    • Low-Fire (04-06)
    • Mid-Fire (5-6)
    • Lusters (017-020)
    • Non-Fired Products
  • Dry Materials
    • Chemicals
    • Plaster
    • Mason Stains
  • Tools
  • Supplies
  • Equipment
    • Pottery Wheels
    • Ceramic Kilns
    • Kiln Parts
    • Kiln Furniture
    • Slabrollers
    • Extruders
    • Carts and Cabinets
    • Pugmills
  • Molds
  • Bisqueware
  • Books
  • Glass
    • Glass Sale Information
  • Services
    • Firing Services
    • Kiln and Wheel Repair
    • Custom Clay
    • Other Services
  • Gift Cards
  • Learning Center
  • More
    • About Us
    • Classifieds
    • COVID-19 INFO
    • Artist Links
  • Ordering Info

Demo: Textured Slab Plates

11/1/2016

1 Comment

 
I can't believe it's already November, but here we are. If you plan on making some of your gifts this holiday season, it's time to get in gear! Between making, drying, firing, glazing, and re-firing, there is a pretty substantial lead time on any clay project, so don't procrastinate! Get ahead of the holiday-gift game and start today. We love these little textured dishes because they are easy to make, look great, don't require many tools, and the technique can be adapted to make almost any form!
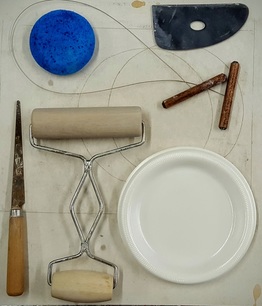
Picture
Supplies:
  • Clay
  • Fettling knife or similar
  • Rolling pin or hand roller
  • Sponge
  • Straight-sided rib
  • Wire cutter
  • Paper plate
  • Texture mold or similar texturing tools

Start by cutting a slice off your block of clay of choice. I'm using Longhorn White for this demo. Roll out a slab that is approximately 3/8" thick. When we apply the texture, it will be thinned down more, so we want to be sure to start with a substantial slab. Roll the clay out gradually and make sure to flip and turn the slab as you go. You can use dowel rods to ensure an even thickness, or just eyeball it.
Gently drape the slab over your texture mold. Armadillo Clay offers a wide selection of designs for texture slabs. I chose this one for its intricate vine pattern! These molds are made from plaster, which releases from the clay naturally and requires no release agent. You can also use lace, stamps, or other texturing tools to decorate your clay slab.
Picture
Picture

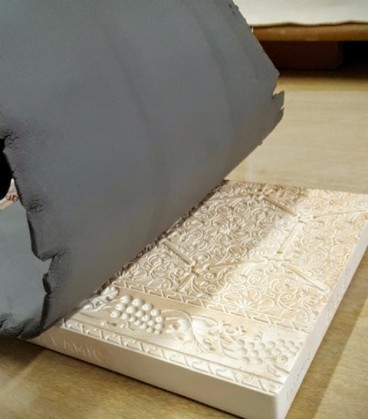
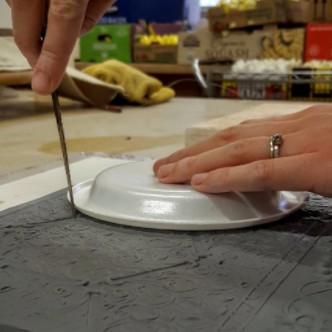
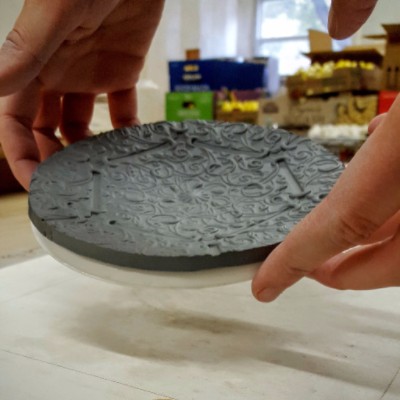
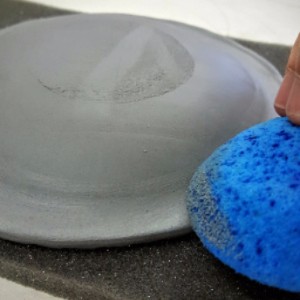
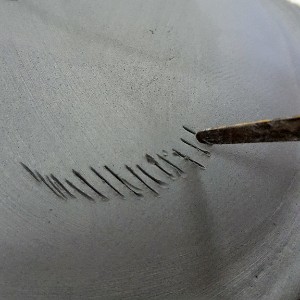
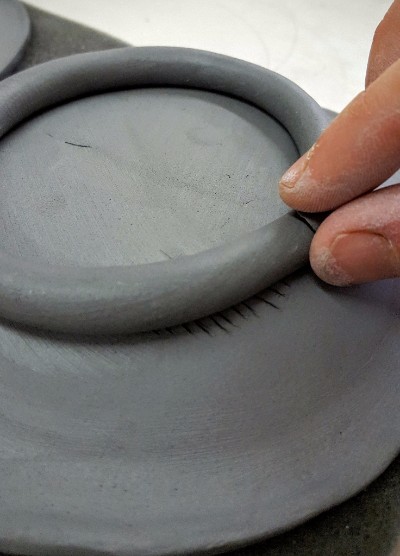
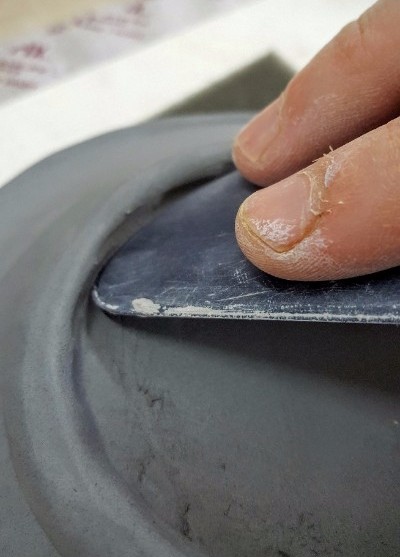
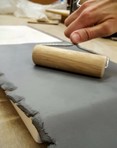
​Using your rolling pin or hand roller, press the clay onto the texture slab with moderate pressure. Make sure to roll in multiple directions, and all the way to the edge of the mold. You can gently lift one side of your clay slab to check and see if the design is imprinted. If it is faint, continue rolling with increased pressure until you get a good impression.

Carefully remove the slab from the mold and lay it flat with the textured side up. Using your paper plate as a template, cut out the shape of your dish using the fettling knife or a similar cutting tool (you can even use a butter knife in a pinch). Turn the paper plate right-side-up and set your round slab into the center. Lift the plate a few inches off the table and let it drop a few times. This will help the clay settle into the form and take the shape of the plate. If the paper plates you have are not very sturdy, you can double- or triple-layer them to help support the clay.
Using your thumb, gently press on the sharp edge of the rim to soften it. Continue this soft pinching motion all around the rim. Don't worry if it isn't perfect, there will be more opportunities to refine later. Let the plate set up for about an hour, or until it becomes soft leather-hard.

When the plate has set up to the soft leather-hard stage, it can support its own weight without the paper plate form. Once your piece is out of the paper form, gently turn it over and set it on a bit of foam to prevent damage to the texture. Keep in mind that this is a dessert-sized plate, and for larger forms like a dinner plate, you 
will need to add a support underneath once you remove the paper plate form and flip the clay piece over. I find that sponges work well for this.
Smooth the edges
Score the foot
Attach the coil
Blend the coil
Roll out a thin coil and tap one side to make it flat. Score the flat side of the coil and the bottom of your plate on the "shoulder", where the flat bottom starts to turn into the rim.

​Brush a bit of water, slip, or vinegar onto the score marks and connect the foot to the plate. Using a rib, blend the coil onto the bottom of the plate on both the inside and outside of the foot. Make sure to use one hand to support the underside of the plate opposite where you are pressing the rib, keeping the foam in between to act as a buffer and protect your texture. Once the foot is blended, you can go back with your sponge and refine the foot and rim. Try not to use too much water, as it will soften the clay again and cause distortion to the shape.


Last but not least, once the foot has set up a bit (about 30 minutes), flip your plate over and give the foot a few gentle taps on a flat surface. This will level out the foot so the plate doesn't wobble.
Picture

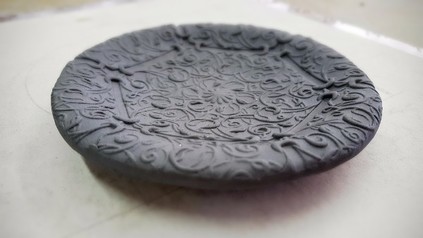
Tada! You just made an awesome appetizer plate/ring dish/catch-all/soap dish/you-name-it! Aunt Rosie will be in raptures!
​

Bonus tip: Choose a glaze that accentuates texture, like Mayco'sElements Glazes or Foundations Sheer Glazes!

1 Comment
Pressure Washing Arcadia link
8/15/2022 10:28:01 am

Lovely blog you have heere

Reply


Leave a Reply.

Hours
Mon - Fri      9am - 5pm  
Saturday     9am - Noon

FIND A DISTRIBUTOR NEAR YOU

Armadillo Clay & Supplies

3307 E. 4th Street
Austin, TX 78702

P: (512)385-7311
F: (512)385-1152

Sign up for our
monthly newsletter!

SUBSCRIBE

For quotes and product availability, please call us at (512)385-7311

  • HOME
  • Clay
    • Low-Fire (04-06)
    • Mid-Fire (5-6)
    • High-Fire (9-12)
    • Non-Fired Clay
    • Casting Slip
  • Glazes
    • Underglazes
    • Low-Fire (04-06)
    • Mid-Fire (5-6)
    • Lusters (017-020)
    • Non-Fired Products
  • Dry Materials
    • Chemicals
    • Plaster
    • Mason Stains
  • Tools
  • Supplies
  • Equipment
    • Pottery Wheels
    • Ceramic Kilns
    • Kiln Parts
    • Kiln Furniture
    • Slabrollers
    • Extruders
    • Carts and Cabinets
    • Pugmills
  • Molds
  • Bisqueware
  • Books
  • Glass
    • Glass Sale Information
  • Services
    • Firing Services
    • Kiln and Wheel Repair
    • Custom Clay
    • Other Services
  • Gift Cards
  • Learning Center
  • More
    • About Us
    • Classifieds
    • COVID-19 INFO
    • Artist Links
  • Ordering Info